| HOME |
|
Infos |
|
|
|
DMX |
|
|
|
Miscellaneous |
|
|

DMX Demultiplexer
The Demux can convert up to eight DMX channels into the equivalent 0-10V signals. This makes it very easy to integrate existing analogue dimmer packs or lighting effects into a new DMX system.
A DMX Demultiplexer consists of the following modules:
1 DMX Transceiver
1-8 Low pass filter with level shifter
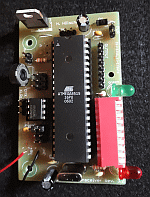
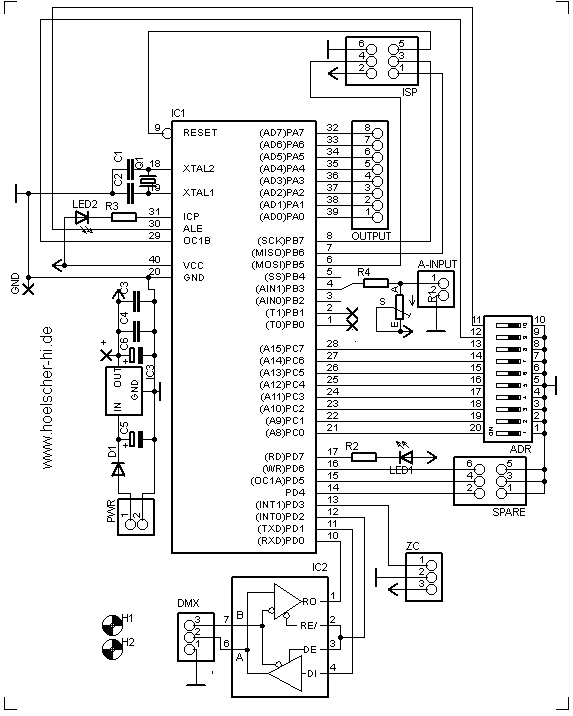
DMX Transceiver (Rev. 3.2)
With this module, DMX data can be sent and received. However, due to using a microcontroller, this circuit is not ideal for beginners.
The Transceiver is suitable for bidirectional communication (e.g. RDM according to ANSI E1.20) due to the complete connection of the RS485 converter.
Industrial-quality circuit boards are available in the shop.
 part list
| IC1 IC2 IC3 D1 LED1 LED2 R1 R2,3,4 C1,2 C3,4 C5,6 SW1 Q1 connectors |
ATmega8515-16PU (+socket!) 75176B (+socket!) 7805 1N4007 LED 5mm red LED 5mm green 10k (PT10-S) 390 Ohm 27pF 100nF 100µF DIP switch (10x) 8MHz (HC49) pin header RM2.54 |
As you can see, the circuit is quite simple: All the magic happens in firmware within the MCU (IC1). It is transferred to IC1 via the "ISP"port. The start address and special options (if any) are set via ADR. The LEDs serve as status indicators. The voltage regulator IC3 ensures a stable operating voltage of 5V. Q1 and C1,2 are needed for an operating frequency of 8MHz. The RS485 converter IC2 allows the MCU to communicate with the DMX universe. With the help of "Spare", various firmware options can be jumpered. Via A-Input, an analogue threshold value (e.g. for thermal protection) can be read.
A supply voltage between 9V and 12V dc is connected to PWR. The DMX Transceiver itself requires <300mA. When selecting the power supply, all loads must be taken into account.
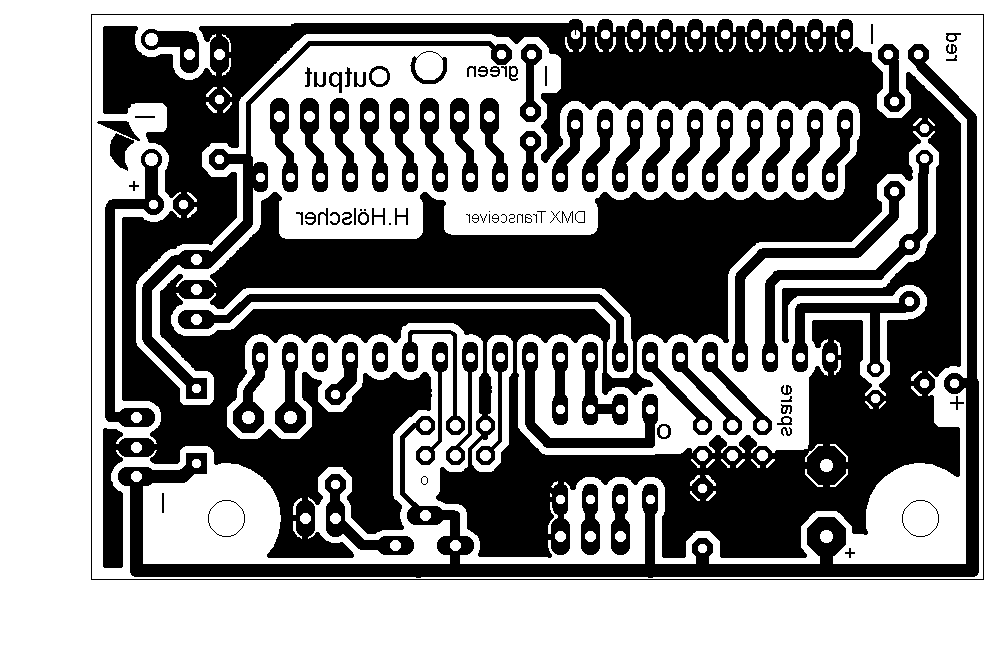
pcb layout (48 * 76 mm^2; 300dpi)
|
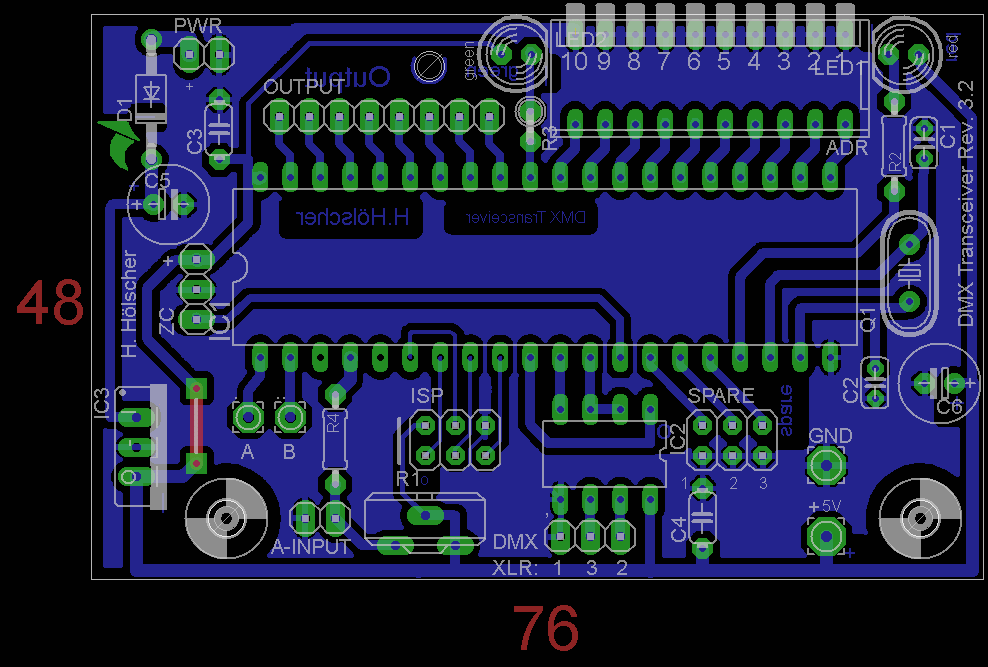
placement
|
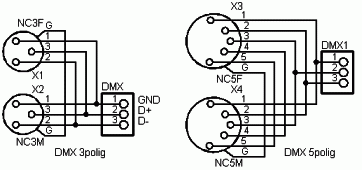
The transceiver is connected to the DMX bus as shown in the next diagram:
Attention: Pin 3 of the XLR connectors is connected to the middle pin of the PCB connector!
Instructions for programming and selection of clock sources can be found under 'Resources'.
After adjusting the fuse bits, the Demultiplexer Firmware should be transferred to the DMX transceiver. This firmware evaluates the next eight channels after the start address and generates high-frequency PWM signals from them.
Filter and Shifter
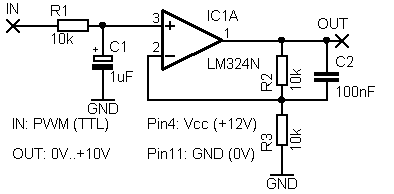 |
A PWM signal is applied to the positive input of the opamp (IC1A) and is smoothed to its mean value
by the RC network. Due to the voltage divider R1, R2 the input voltage of 0-5V is doubled to 0-10V at the output.
C2 ensures that residues of the PWM are not amplified. With larger values of C1 and R1 the ripple can be further reduced. |
Debugging
The ErrorLED should light up during start-up. A change in the relevant relevant DMX channels is acknowledged with a flashing of the green LED. An error is indicated by the ErrorLED flashing:
| Pattern | Error | Solution | |
|
|
single flashing | There is no signal present at the Transceiver. | Connect the Transceiver to the DMX bus. |
|
|
double flashing | The signal is not recognised as DMX. Not all required channels are received. |
Swap D+ and D- on the DMX connection. Transmit more channels or select a lower start address. |